About Me

I have spent many years designing and creating Christmas Trees and displays. I would like to share with you what I have learned, and you are welcome to share you suggestions and ideas also. I hope you enjoy reading these blogs and hope they have helped you add enjoyment to your decorating endeavors. In an effort to make these posts as informative as possible, as I come across photos and information that would be best used in these posts, you may see them change from time to time. Please be patient, as this is always a work in progress. Thank you:-) Follow me on instagram: https://www.instagram.com/holidayknights/

Sunday, October 23, 2011

Re-using Halloween Trick-or-Treat Baskets

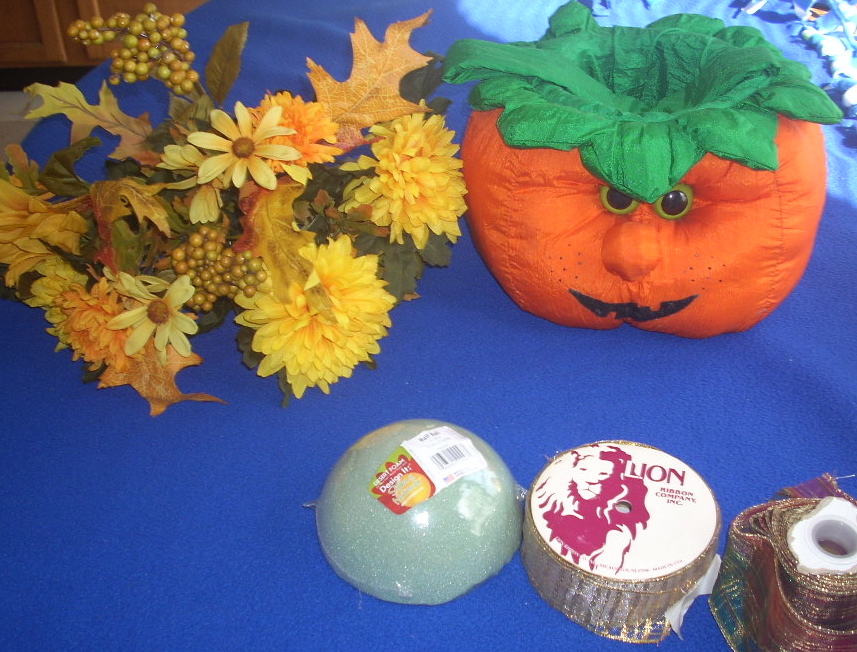
Don't throw away those old Halloween trick-or-treat baskets and bags. Re-use them. Here is one I designed this year. This basket is a little nicer basket than usual and I couldn't throw it away and didn't want to sell it. This first picture is the basket and what I plan on putting in it. 


The first thing I did was place the 1/2 Styrofoam ball into the basket. I never glue anything down if I can help it, because I like to change things around every so often. 
After I place the Styrofoam in, I add the flowers. I bought the flower in one bunch, so I used wire cutters to cut them away from the main stem. I push them into the Styrofoam which holds them in place. 

Lastly, I put in the scarecrow on a stick in the basket. Because it was on a stick it pushed into the Styrofoam just as easily as the flowers. This is quite easy, and very cute to use in a Halloween display and continue it over into Thanksgiving.

After the holidays, you can cover this with a plastic bag and keep till next year, or take it apart and remake a different variation for next year. Fun and cute!

Friday, October 14, 2011

2011 Fall Wreath with matching floral arrangement

Well it's been a little while since I added anything new to this blog. I have been working at a new job and haven't had as much time. I did decorate a little for Halloween and the Fall season so I went ahead and took pictures as I worked. Completely new this year is a Floral fall wreath and matching flower arrangement. 


To make this wreath I used a grape vine wreath I purchased at Wallmarts. I believe it ran $3.50. In fact, everything on this wreath is from Wallmarts except for the ribbon. The flowers were on a large pick. The leaves were also. I used wire cutters and cut off what I needed in the wreath. The first thing I did was wrap one of the ribbons around the wreath. Next, I put in the eucalyptus leaves. They came in fall colors and it was $5.00 for the batch. After the eucalyptus leaves, I put in some silk fall leaves, both maple and oak.


After the fall leaves I put the flowers in. When you use a grape vine wreath, you can push the flowers and leaves right into the wreath and they will stay put. Hot glue is not necessary. I left an area right in the middle for the bow. I used two ribbons and made one bow. To learn how to make a bow you can find directions on my blog http://christmasknight.blogspot.com/2011/08/decorating-for-halloween-making-bows.html Finally, you can put a wire on the back of the wreath so that you can hang it up. I spent approximately $20.00 for the supplies to make the wreath and flower arrangement (with the exception of the ribbon, which I already had).

After the wreath was finished and hung up, I took the left over eucalyptus, leaves, and flowers and put them in a large crystal vase. I made a matching bow, tied it to the last leaf I pushed into the vase and voila, I was finished. Here is a picture of the flower arrangement.


I hope you have enjoyed this blog and it probably took me as long to write and publish the blog as it did to make the wreath and flower arrangement. They both are extremely easy to make and bring a Fall look to your living room with class.