Many people have asked me how I learned to decorate. This blog and the pictures are dedicated to my
teachers. I don't know if they knew they were teaching me at first or not...but I was like a sponge. My teacher's names were Charlie and Bill. I will not use last names because they are not around anymore to give me permission. Since those days, Charlie and Bill have both passed on. I do not know their family members to ask permission. In this blog I will refer to them by their first names and not show their facial pictures...only their work. I first met them when the gift shop I worked at decided to open a Christmas department. Charlie and Bill were the sales representatives for the Silvestri Company. They not only sold us the product from Silvestri, but provided the services of setting up all the Christmas trees and displays. At that time we only had one room in the department. It was about the size of a Hallmark store found in most malls. They waited until all the trees and lights were shipped and then came out for a day or two and taught the employees how to light christmas trees. This was before you could buy them prelit. They showed us how to light the trees and then left. The employees ended up putting close to thirty sets of lights on each tree. Way to much...but then we were new at it. They had us start at the bottom of the tree and wind the light cords around the base and up the tree. The trees looked great...one slight problem, we couldn't get the light strings off when they needed replaced. After about three years of having to cut light strings off trees so we could re-use the trees, I came up with the method of lighting each section of the tree. If you would like the directions, this is the web address. http://christmasknight.blogspot.com/2011/05/lighting-your-christmas-tree-so-you.html The employees had to have about 20 trees of various sizes lit for Charlie and Bill before they came back. This took about a month.
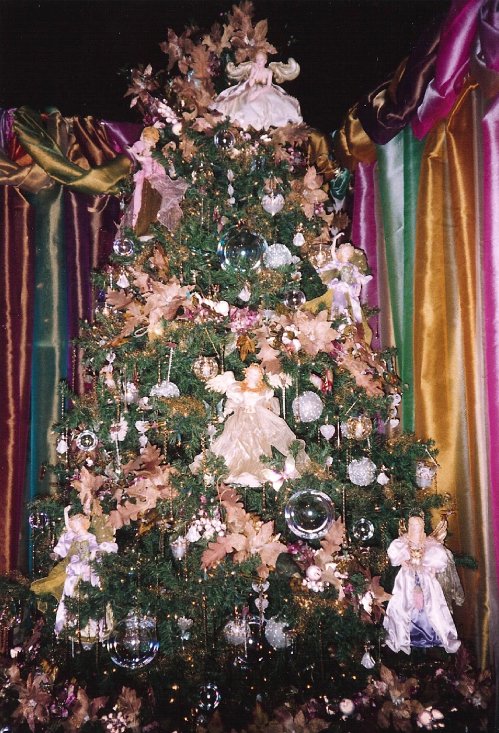
By the time the trees were lit and set up...the rest of the product had arrived. Charlie and Bill would come out for about a week. We started in the morning about 9:00am and sometimes work until 2:00 am (then come back and do it again the next day). They taught us how to make bows and unpackage enough merchandise for them to put on the tree. The employees put solid colored bulbs on the inside of the trees. Charlie and Bil lcreated the themes and decorated the rest. I watched and learned. At the end of every year those trees had to be taken apart and taken down. That was my job. By doing this I learned how they put their trees together. What did they use first? What came last? I learned all the secrets by dismantling the trees. By the third year the gift shop had opened a second even larger room in the Christmas department. At least ten more trees and a huge area for collectables was added. Charlie and Bill were no longer able to finish all the trees. I finally had my chance. I wanted to show what I had learned. Under the tutilage of my boss who was also very talented I started decorating what Charlie and Bill couldn't finish. With each tree I designed and decorated I got better and better. As Charlie and Bill came to visit to sell more product they would see my work and spent less and less time there. As the department manager, I saw a lot of waste and over-usage of product and made some changes. The gift shop brought in product from a larger variety of wholesalers and the days of Charlie and Billcoming to the gift shop to decorate came to an end. Although the gift shop no longer used their decorating services, it continued to buy product for as long as Charlie and Bill worked there. This is how I learned to decorate...the ideas for the trees that came later...I guess it was a gift. I feel blessed to have been able to do a job for so many years that I loved and was inspired to do. There was never a great deal of money but...it made me feel good about being able to create something beautiful. I would see it in my mind and recreate it with my hands. So, this blog is dedicated to Charlie and Bill, to their creative style and generosity in teaching others about their finest work. The photo's in this blog are the work of Charlie and Bill, and I will include a brief description of each. Although they are gone, the memory of their work lives on...Thank you Charlie and Bill
This tree was to symbolize marriage. They used an antique curio and used decorations of white and clear and lace ribbon. They used very tall white candles to give an elegant look to the tree. Beautiful.
This tree is an egyptian tree, they used Radko and polonaise ornaments. The sarcophagus was a collectable from another room in the shop.
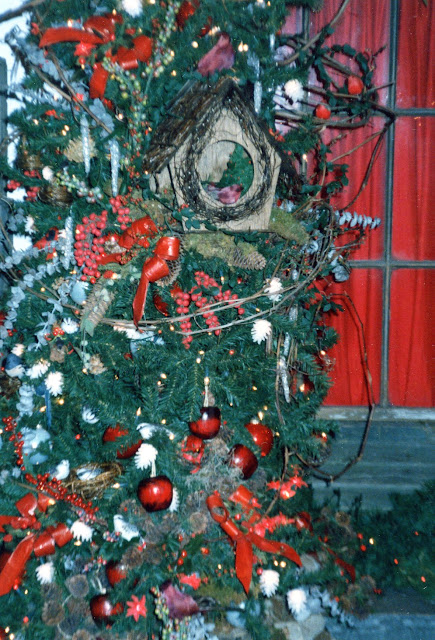
This tree is done in red. Small red candles, Woodland red Santas adorn the tree. Grape vine wreat has been opened and wrapped around the tree. Eucalyptus is used as a filler.
This is the same tree as the picture above. Bird houses, bird nests, and birds are in the tree as well as pine cone novelty lights. A variety of moss was used to achieve a woodsy outdoor look.
This tree features snowbabies. These are some of the original pieces done by department 56 before they made so many figurines. They used large white snoflakes and red berries in the tree. It made a striking difference. Charlie and Bill were creative and will be missed. I learned so much just from taking apart what they made.


