About Me

I have spent many years designing and creating Christmas Trees and displays. I would like to share with you what I have learned, and you are welcome to share you suggestions and ideas also. I hope you enjoy reading these blogs and hope they have helped you add enjoyment to your decorating endeavors. In an effort to make these posts as informative as possible, as I come across photos and information that would be best used in these posts, you may see them change from time to time. Please be patient, as this is always a work in progress. Thank you:-) Follow me on instagram: https://www.instagram.com/holidayknights/

Monday, May 30, 2011

Decorating Stairways and Newell Posts.

Because I was decorating for a business, when I decorated the staircases, I had to make sure there was 1-2 foot open space on the banister. For safety reasons this is always best. 

I used 9 foot green garland. Could be blue spruce like my first picture, or American Fir short and long needle. What ever kind you like. When the stairs have horizontal spindles you'll need to wind the greenery through every fourth spindle. Loop the greenery over the top and skip three spindles to wrap again. This way the greenery loops always have the same distance between them. I don't as a rule use lit garland here. Again for safety sake. You wouldn't want anyone to trip on the cords.

I keep the decorations here pretty simple. I usually place a bow at the top of the loop or on the banister rail. I use berries and flowers along with the ribbon. Typically I match the ribbon and flowers to the closest Christmas tree. 

This picture shows blue spruce short needle garland. I used a metallic pink ribbon. The berries and flowers are mixed pink, mauve and burgundy. The newell post is the same with a larger bow and the flowers hanging like a swag.


On this banister and staircase I used American fir short needled. I did not swag, or create large hanging droops. I kept it very tight. This is an extremely wide staircase and the banisters needed to not catch on luggage as it went up the stairs. This time I used ribbon only. I used three types of ribbon to make the bow. I used a number 40 paisley ribbon for the bottom and two thinner ribbons called french ribbon. The colors were blue, purple, green and a little mauve. This is simple but elegant.


If you like you could loop in beaded garland and even hang bulbs from the stair rail. I just recommend that it isn't used as much, or you may have broken ornaments. In one of the homes I visited the folks used the largest elf (see: Putting collectables in the tree) sliding down the rail backwards like some kids/adults like to do and had a couple more hanging off their chandelier on the stairway landing. I loved it!

Sunday, May 29, 2011

Carry your Christmas Theme throughout the Room : Mantels

Another way to carry Christmas through out a room is to decorate mantels and various pieces for furniture.  This blog will address mantels. Typically, I start with a 9 foot piece of garland. I light it with one string of 50 lights. I choose either clear lights which go with anything or colored lights depending on the color scheme. One of my favorite colored light sets is a set with clear pink lights, frosted cream, and clear white lights on one string. If you shop around you can find all kinds of light sets, some very traditional and some are quite outrageous. Here are some different mantels I decorated. Most of the time they carried through the theme I had on the tree in the same room. Some though were mantels in a Bed and Breakfast and there was no tree in the bedroom suites. This was a way to bring Christmas into the guest bedrooms. 


This mantel has a beautiful gold edged mirror above it. The mirror is large enough and sturdy enough to support an arrangement of it's own. For this mantel and swag, a green American fir 9 foot evergreen garland was used. On the mantel it was stretched across and the ends brought back into the front giving it a much thicker look. Lights were laces through the garland (try to hide any wires). Velvet two tone roses were used, along with berries, fern and other small floral fillers. Seven candles sticks were set on the mantel with candles that were a burgundy color to match the roses. Burgundy glass balls that matched those hung on the tree were placed around the candles. For the swag on the mirror. The greenery was attached at both ends and draped low in the middle. Two angels that matched those in the tree were placed on each side. The roses and florals were then placed in between the angels. As you can guess, this arrangement matched the Christmas tree placed in the room.  

  
This mantel has a very simple "Traditional" look. A piece of garland is laid over the top of the mantel. Then a grape vine wreath is taken apart, opened up, and placed standing in the middle. Small pieces are laid through the rest going to either side. Eucalyptus and raffia, as well as a plaid ribbon is placed through the garland stretching out across the mantel. Red Berries and Red Birds are the last items to go into the arrangement. It's quite simple and brought the same Christmas theme as the tree to another part of the room. I will show the matching tree in up coming blogs. 


This mantel is quite old and as you can see at one time it had a mirror between the bottom shelf and the top shelf. The mirror had been broken and then removed. We covered a board with a piece of black material so that any thing placed on the bottom shelf would show up. The colors in this theme are gold and silver. On the top shelf a miniature two foot tree was placed and decorated. One large bow and an assortment of little bows in gold and silver are placed all over the tree. A piece of garland extends across the top and the same bows and ornaments adorn the garland also. The tree that matches is seen on the left. On the right a piece of garland extends down the side of the mantel to the floor. A Gold and Silver bare tree sits in front. Lastly, a two foot paper mache goose sits on the bottom shelf of the mantel to complete the look.  This had a "Traditional" look with the colors of gold and silver. It's traditional and elegant.

I have other mantels to show, so be sure to watch for upcoming blogs about more mantels. Again, thanks for reading.

Thursday, May 26, 2011

Carry your Christmas Theme throughout the Room

Christmas is a beautiful time of the year, and most people love to decorate more in their house than just the Christmas tree. One way of doing this is to create matching wreaths and hang them on the wall above a fire place or in place of a picture that was there. (Just put the picture behind the sofa that's against the wall. It will be fine for the month that you hang a wreath in it's place.)

Most people have some ribbon and flowers and a few ornaments left over after they finish the tree. If you don't, try buying just a little extra the next time you shop for Christmas decorations. Use these extras to create a wreath that matches your tree. If you wove the ribbon through the tree but didn't make bows, you can do that to a wreath. You can also switch and make bows, it will still look like it belongs because your using the same ribbon. Add in some of the flowers and ornaments. It carries the theme into other areas of the room. If your using large items in the wreath, make sure you tie them in so they will stay put. I have put large collectables in wreaths has well as trees. Some of the following photos will explain perhaps better than my writing. 


I know I showed this picture before, but it's perfect to show what I mean about the wreath matching your tree. The wreath was extremely simple to do but looks very sophisticated. I used more of the gold lame material to create a fan shape where I would have placed a bow and then wove the material through the wreath. I had one large Angel plaque left and tied it into the wreath. Notice the bead garland...it also matches what I did with the beads in the tree. I used one string of each kind of bead garland to swag it into the wreath to match the tree. There is nothing else on this wreath, it's a very simple but sophisticated design.


The tree on the left is the one that matches the wreath in this picture. Again, it's very simple and carries the theme throughout the room. I used matching ribbon woven through the wreath with one bow. I then tied in a large collectable Santa into the center of the wreath. The tree has the same type of Santas in the tree with matching ribbon, bows and some Santa icicles. This tree was called "Santa's Delight". The Santas used were Clothtique Santas.


This tree and the following wreath are a perfect match. The same paper mache Santa is used in each. Everything else in this wreath is dried flowers and a few silk flowers. I also added in pine cones and eucalyptus leaves. The tree has the same flowers and outdoorsy look. I recreated this tree for LTV Steel Co. (no longer in business) and the tree won the premiere award in the Annual Angel's for Easter Seals Parade of Christmas trees.
This tree is very out doors looking, and brick was laid under the tree, along with a picket fence and large rocks (Look for an upcoming blog about what to place under the tree).


Monday, May 23, 2011

Ornaments: How many to use, and where to place them!

When decorating a tree, I like to use a large assortment of ornaments. A tree will have more personality if you use assorted sizes of ornaments. If you used all the same size ornaments some of the special ones would get lost in the sameness of the tree. If you use a variety of sizes of ornaments, it gives depth and texture to your tree. It helps to break the  tree into smaller sections that are more interesting to see. 


Notice on this tree, there are very large purple balls. The angels are quite large also. The purple and gold are excellent contrasting colors. Using colors such as these, the tree is just as pretty with the lights off as well as on! The bunches of purple poinsettias also help to break up the vastness of the tree (this is an 8 ft. full tree) Then there are some medium sized gold cherub heads, as well as some gold instruments. Lastly, there are lots of small ornaments all over the tree. Using icicles gives a droopy snow laden look to the branches and should be placed on last, except for the special ornaments. The special ornaments are always placed last and should be at head level to draw attention.
When placing small ornaments on the tree if you want them to stand out and be noticed, place them in bunches of 3, 5, or 7. This makes them much more noticeable. I'm not sure why, but I have always placed odd numbers of ornaments on the tree, never an even amount. Notice on the tree above how the ornaments just pop out at you. Of course the variation in color helps. This is a Victorian Tree I decorating in a dining room of a Bed and Breakfast. The colors used are burgundy, mauve, pink and cream. The ornaments are a quilted fabric with tassels at the bottom of each ornament. The ribbon, flowers, and berries blend perfectly.

After you placed all the regular ornaments, now is the time to go in and place the special ones. I have ornaments that are picture frames. I have placed special pictures of family members and friends in these frames and they go on last. Make sure to place them in spots on the tree that are highly noticed. Some people have specialty ornaments that bring good luck like pickles, spiders webs, or small purses that hold money. These always go on last. The only things you might put on after would be angels hair or tinsel.


This tree has a large variety of items on it. There are large dolls and teddy bears. The bows and ribbon give the tree unity as well as the variety of toys all over the tree. If you look close, you can even see tiny crystal ornaments that brings some glitter to the tree to offset the material bears and dolls. This tree was themed as a Toyland Tree.

Sunday, May 22, 2011

Using Flowers and Ribbon in the Tree

In this blog, I address using Flowers, ribbons, or "whatever you like", to create uniformity in your tree.

In the second stage of decorating (after the balls and beads) I use either ribbon, flowers or material as another type of garland around the tree. The purpose of doing this is to unify the theme of the tree. If you use something on the top of the tree, use it again (at least three more times) through out the tree. "I know, many people have a special star or Angel they put on top." That's okay, just put some flowers behind it then use the flowers again through out the tree. By doing this, you can really give your tree that professional look and the whole tree has a unifying look. 


Tree description: For this tree, I didn't make the top of the tree the focal point. I made the focal point the center of the tree. The baskets in the tree are the focal point. I did tie the theme of the tree together by using bows made of ribbon. There is a bow at the top of the tree with exact duplicates placed in other areas of the tree. I used some flowers with the bows also. The ribbon and flowers are what unified this tree, and the colors of the ornaments, ribbons, and flowers lent to the colors of the baskets. The entire tree is done in varying shades of purple and green.

Other items that can be used in a tree as a tree topper or focal point are Santa figurines, Angels, Stars, Baskets, Bows, Treasure Chests, and Flower arrangements. The list is endless...The only thing that would end this list is your imagination.

This next tree is for music lovers: Imagine a Tuba in a Tree. The entire tree is decorated using musical instruments, musical notes, and musical ornaments. The Tuba is real, it weighed a ton:-)


This next tree has Treasure Chests in it. I used beaded garland and clear colored balls to make it look like it was filled with precious jewels. It's actually a very colorful and bright tree.


This last tree I actually did in my own home. I love Candy Canes and wanted to add them to the theme of my tree. I use Polonaise ornaments and wanted to give my tree a fresh new look. By changing the ribbons (Walmarts) and adding the giant candy canes (Dollar General Market) it has a new look. I only spent $25.00 and have a whole new look! If you wait till after Christmas, you can find some awesome deals.


So, to sum it up: The first tree is pulled together with the bows and baskets. The second tree is pulled together by ribbon and flowers (The focal point is the Tuba in the center of the tree). The third tree had the same ornaments all over the tree, with the focal point being the Treasure Chests in the tree. The fourth and last tree is the one candy canes shooting out the top of the tree, and also out of various spots throughout the tree.


Done lighting the Tree, What's next?

After lighting the tree... What comes next? Ball and Beads!

Usually I place solid colored balls (large and small) through out the inside of the tree. This creates depth because the lights sparkle off the balls. Tip!! If you don't wish to spend as much money, use tinsel garland and wrap it around the inside of the tree. This produces the same affect for less money!

After the balls, the next item I place on the tree is the beaded garland. There are many ways to use the garland. My favorite look is a very droopy look to the garland. I usually place three or more strands together as I place them on the tree, letting them droop the way a person wears more than one necklace (letting each strand hang down longer than the last). This next picture will give you a good idea of what I mean. I used the same affect in the wreath hanging next to the tree to keep the same theme going.


Tree description: On this tree I didn't use ribbon. I actually used material and gathered it to make a fan shape. I then draped it down to the next fan shape to give the same affect as having a ribbon garland on the tree. Because of the thickness of this, I didn't need to use any floral in this tree at all. The angel plaque that I used on the top, I carried through the tree and added to the wreath. I used a variety of shapes and sizes in ornaments. The colors I used were gold and cream/white. ** Notice the base of the tree. This is just a type of container you can find at a nursery, people use them to plant flowers and place them on their porches. Notice the matching wreath.

There are numerous ways to use bead garland in a tree. I have used three different strands of beads and tied one end of them together. Then tie that end to a chair (or have a person hold them for you) and braid them, just like your braiding your hair. When you reach the end, tie it off with a bag tie. Place through your tree.


A truly spectacular way to use beads is take one or two strings and loop them like you would loop your water hose. Attach them into your tree with a bag tie. This is extremely pretty if you use a bead garland that is a little different, like this picture. The garland is sugared candy.


The last way I will write about for now is running the bead along through the tree with your ribbon. This is different, and more difficult to do. You will need lots of patience.
Keep it tight and tie it into your bows.


Again, Thanks for reading and have fun with the garlands. They can make a Christmas Tree very beautiful!

Friday, May 20, 2011

Professionally lighting your Christmas tree with novelty lights.

 This gif. image was created by my daughter for my site. I love it!!!

Visit urbanchristmas on youtube.com

Novelty lights are any string of unusual light sets. They can be lighted candles, bubble lights, and old fashioned large bulb Christmas lights. They can be icicle lights, snowflake lights, and even angel lights. Sometimes you can find flower novelty lights. They come in all shapes and sizes. Sometimes you can make your own novelty lights. Typically they come 10 lights on a string. Sometimes you can find orbs, and other single items with multiple lights on them. There are even fiber optic novelty lights.


When using novelty lights on a tree, I usually cluster them. For example, let's say you have a Christmas bells novelty light string. When you place them on the tree, cluster 3 to 5 bells very close together. You can get about 3 clusters of lights from each string putting them in clusters of three. The odd light that you have when moving from one area to the next, you can pull off the light. When you get three, make a new cluster by putting them over the regular light string. You might want to wrap a colored bag tie (make it hard to see) around the bottom of the light in each of these so you can find them later. When you un-decorated your tree, make sure you locate these and put them back with the string they belong with. For a 7 1/2 full tree you would want to use about 3 to 4 sets of the bells, (or any other novelty you have). Any hanging novelty lights do well with this. If you have snowflakes, I wouldn't cluster these, I would just scatter them across your tree.

There are two types of lights that you need to try to keep standing up straight on your tree. These are: candle novelty lights and bubble novelty lights. The candles just look much better standing up straight. With the bubble lights it's important to keep them straight for the best performance. The way they work is... as the light gets hotter and hotter it makes the liquid in the bubble lights boil. As it boils the liquid goes up the stem and looks like its making bubbles inside the light. If it is not straight they don't work as well. The two trees shown on this page have bubble lights and candles. 

This tree has large plaid bows on it. The tree topper is one large bow. This ribbon was a two sided ribbon. One side had plaid, the other side was denim material (like blue jeans). When I made the bow, I made it so that I had about four loops showing the plaid and four loops showing the denim. To pull the theme of the tree together, I added about 6 more of these bows to the tree (with the topper it made 7, remember odd numbers). I wanted this tree to have a fun look to it. The store wanted to sell Polonaise ornaments. Much of Polonaise is licensed product from M&M's, Sesame Street, Betty Boop and others. This is a thick glass ornament very similar to Radko. To make it fun, we added stuffed bears, bears in stockings and lots of bubble lights. We also used regular multi-colored strings that were tied into bunches of 10 lights and placed in the center of the tree. This helped give depth and more color to the tree.


This tree was one of my favorites. This tree has a Victorian look to it. A shiny poinsettia flower with little clusters of smaller flowers and berries are used in the tree along with two different ribbons and three strings of bead garland. The ribbon and bead garland are run through the tree like a garland together. At each point where the garland is secured the flowers where placed. Along this line of garland I ran some strings of novelty candles. Notice at the base of the tree, these lights followed the garland down to the floor. Beautiful birds, Santa and Santa sleighs were used in the tree. The color combination in this tree is creamy white, mauve, pink and a touch of dark pink. This is a very elegant looking tree.


This tree had two topiary trees on either side of it. I used Red poinsettia novelty lights on this tree and the potted plants of red poinsettias were placed around the bottom. The ribbon used was a two sided ribbon. A beautiful poinsettia pattern is on one side, the other had a metallic gold ribbon. A variety of red ornaments were placed on the tree. The lights were very popular. The display was better than these pictures, I apologize for my photography. I'm not a professional although I do try very hard. The middle tree is set inside a planter and gold metallic material was used as a tree skirt around the base of the topiary trees.

Lighting your Christmas Tree so you never need to again!

Visit urbanchristmas on youtube.com

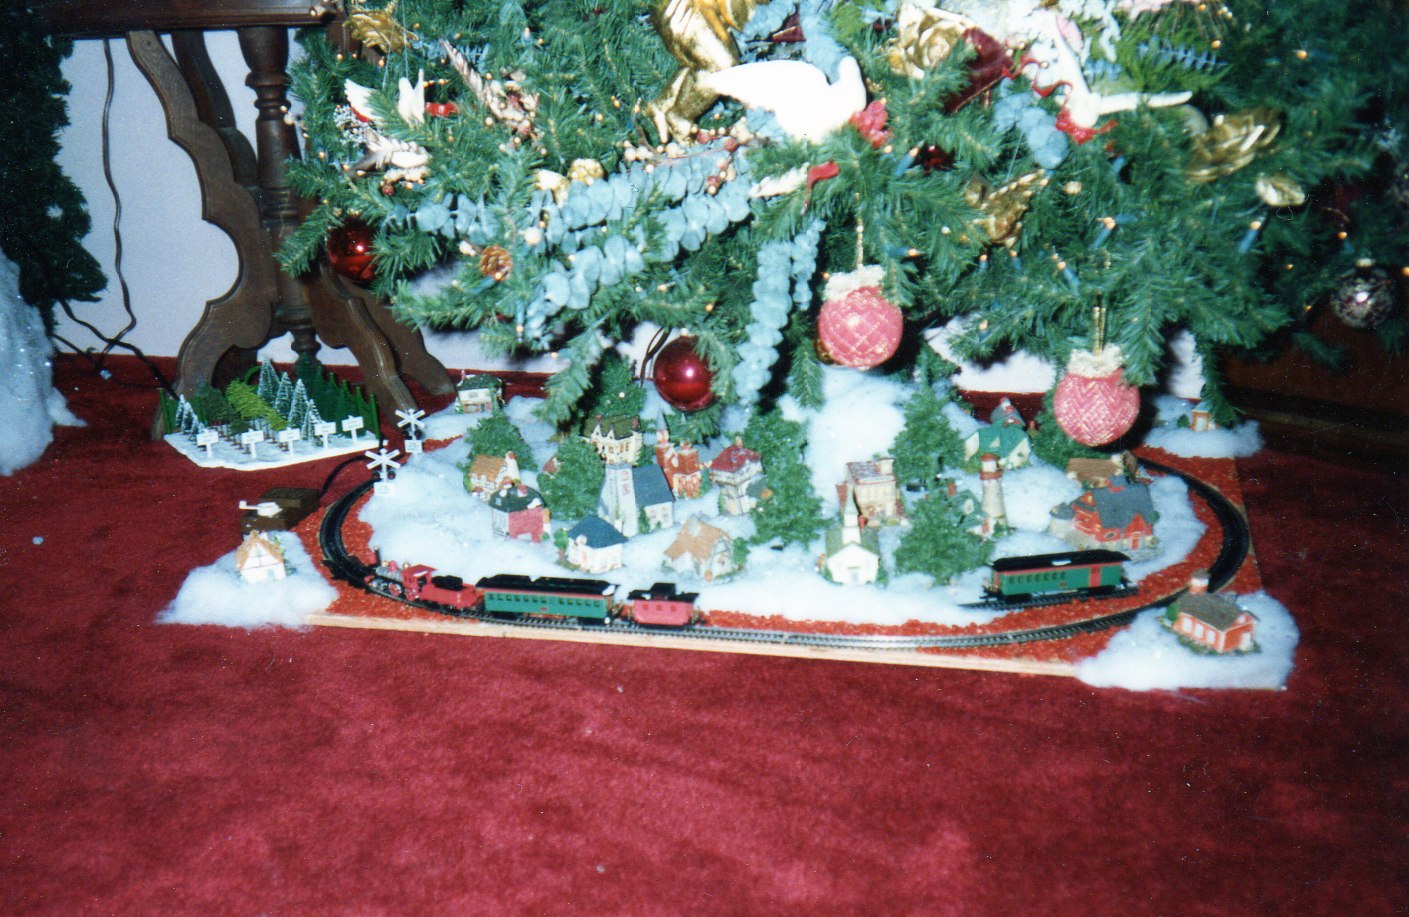
Professionally decorating a Christmas tree is easy if you know some of the secrets. As with most things, you need to do the prep work first. When you bake a cake, you can't put the frosting on until the cake is baked and layered or shaped first. It's the same with a Christmas tree. 

The first thing you do is light the Christmas tree. You could light it as most people do and just lay the light strings on the branches starting at the top and working you way down... Or you can light it professionally. When you do it this way, you only have to do it once. After that leave those lights on the tree till they burn out. With maintenance that shouldn't be for a long time.

To be able to do this, you need a tree that comes in sections (usually three). The secret is to light one section at a time, then put your tree together. The procedure remains the same for each section, but the number of lights used will change depending on the size of your tree. The instructions below are for lighting a 7 foot Slender American fir.

Place the largest section (the bottom) of the tree into the stand. Pull the branches down (if it's an umbrella tree, let them fall into place). Plug in the power strip and place it at the outer edge of the tree when the branches are pulled down. Plug you light string in (I don't use strings with any more than 50 lights per string /easier maintenance) and run the string into the trunk and wrap around the trunk moving upwards to the top of the section. Another reason I only use strings of 50 lights is because with the 100 light strings sometime 1/2 the string goes out but the other half still works. It's harder to remove a string with 100 lights.


Once you're at the top of the section, start wrapping the light string around one of the main branches (opening the tips as you go). When you get to the outer tips you should wrap the lights out about half way then go back (continuing to wrap). Each branch on this section should hold about fifteen lights. Wrap the lights going back around the center branch to the inside, and then move to the next branch. You should be able to do about three branches per light string. At the end of the string, (make sure you end the string more to the inside of the branch) tie the light to the tree using a colored bag tie (NOT GREEN) preferably white or red. This is so that if your light string needs to be removed or repaired you know where the end is. Continue this until you have lit the complete section.

Remove this section from the stand, place the next (middle part) into the stand. Make sure you have measured off at least four feet of light string before wrapping it up the middle to start lighting at the top. Plug in and repeat the method for lighting. These are smaller branches so they will require fewer lights. You should use approximately ten lights per branch. When you're finished, remove this section.


The last section is the top of the tree. Measure off at least six feet of light string to this section before winding around the base to top of the section. (Or you can plan on using an extension cord to this section that way if you are using a lighted tree topper it can be plugged into this cord also.) This section typically has very small branches at the base and then only tips at the top. You light it the same as the other parts but you will need to use the tree trunk as the main branch when lighting the upper tips. Light this section completely then remove from stand.

Place the bottom of the tree in stand and secure it so it is firmly held and straight. Next, put in the middle section, and finally the top section. Plug all sections in. Fluff the branches and tips of your tree to make it look full.

At the end of the season, after you have undecorated your tree, check for burned out bulbs. Replace them. Take your tree apart in sections. Gently squish the branches to the base of the tree, place back in the box, and pack away till next year. When you take your tree out next year, just put the sections together, plug in, check for burnt out bulbs (you can never do this to often), fluff the tree and Your ready to decorate.

If you should end up having a string of lights not work, just locate the end of the string by finding the white/red bag tie and take off just this one string. Replace the string. The rest of the tree should still be lit and beautiful.

I learned how to do this the hard way. My experience with fixing light strings came from having to un-light entire trees. Some of the wires where so tangled up around the bottom of the tree, it was impossible. I had to cut the strings off. (I knew enough to make sure the tree wasn't lit at the time). This is what gave me the idea of the bag ties. You do this with 30 trees a year and see if you don't learn a trick or two. Now you can go out and buy a pre-lit tree. However, if you do it yourself, you can probably save a lot of money.

Thursday, May 19, 2011

Collectables in your Christmas Tree : Here we go Again

Collectables in a Christmas Tree may not be for everyone, but I let's you put out your Christmas Collectables without taking up to much extra space. Most people put a tree up anyway, so why not kill the proverbial two birds with one stone? I found these pictures and thought you might like these ideas also. This first picture shows Snow Babies again, but more of a country feel to it. Not very much glitz. The tree is a Blue Spruce Full, and the Snow Babies have been tied in. Some ribbon is laced through the tree, but the overall effect is very simple.


This next display is Snow Babies in an Upside Down Tree  with a shelving unit built around the bottom to display the larger, heavier pieces. This is a really great look. Check out the giant snow flakes:-)


This next photo is a look at a collection from Enesco. It was called "North Pole Village" (I think). It featured all the reindeer and the elves. This set was adorable. I used the large stuffed elves to make it look like the elves snuck in during the night and put up this tree (it's the one on the left with the elves in it).


Well this is all I have for now. Again, thanks for reading and I hope you getting all kinds of ideas for this next year. Just remember to tie in the collectables or they won't remain collectable for very long.

Christmas Villages: One more time

Visit urbanchristmas on youtube.com

I have talked about different ways of displaying Christmas Villages, and found a few more pictures. Yeah, I know I show a lot of pictures. In my defense I'm a very visual person. I believe a picture is worth a thousand words. Early on in my career, when villages where just becoming popular, people displayed them under a tree and many times they had an electric train hooked up to go around too. This next photo is a little display doing just this look. It's not my favorite but when you have very little space it works quite well.


If you look closely, you'll notice a board was used. This kept the houses stable and the train stable. Sometimes a carpet gives, and even a little bit will make the houses look crooked.

This next picture is one of the first displays I ever did for Christmas Villages. A shelving unit was built special for this display. The top shelves were only about a foot in depth. As the shelves progressed down, the depth became deeper. The bottom shelf is approximately two to two and a half feet. It was covered completely in blankets of snow. I laugh when I see it now. It's not bad, but sure doesn't show off the merchandise as well.

These next to pictures will show the villages the way I loved to display them. They just look like real miniature towns and villages. The use of the accessories just makes it come alive.

This next picture is a picture showing the display model of the room during the day. The first Christmas Village article showed the display room at night (lights off), this one is with the lights on. Which is your favorite? Comments are welcome!


Last, but not the least, Dept 56 came out with a Halloween set. I absolutely loved this set. I had lots of houses with movement and sound.


Just as I gave a how to do these displays for the Christmas Village, I did the same with these houses, with one exception. I didn't use snow to cover cords. For this display I used Spanish moss, peat moss, sand stone and regular rocks, and sand. Even miniature fall leaves look great under and around the houses and accessories.
Well, this is the end of this post. I hope you enjoyed and thanks again for reading:-)

Visit urbanchristmas on youtube.com

Wednesday, May 18, 2011

Christmas Villages Revisited

Visit Urbanchristmas on www.youtube.com

These are more photo's I found of different Christmas Village displays I created. Again, I always work with Dept 56 Villages. I tried to make the villages as realistic as possible. Winding the roads through the various buildings, making the roads have curves and small hills also helps. Using a variety of trees in the display really makes it come alive. Hope you enjoy these.


This is from the Dept 56 Dickens Village. The skating pond was on of the first accessories they had with moving parts. The skaters moved around the pond.


Notice the variety of trees and how the buildings are easy to see because they are placed higher as they get further back in the display. The mountains where an accessory offered from Dept. 56


This is another Christmas in the City. By having the streets and the Canal extend from the front of the display to the back it has added a lot of depth to the display.


This is the Original Snow Village. This Christmas village is just a blast to work with. Check out the bumps in the road. Really gives it a look...doesn't it?


This blog might not make sense if  you didn't read the blog on Creating a Christmas Village. You should read it first, and this will make more sense. Thanks:-)

Another Look at Putting Collectables in the Christmas Tree.


This was the #1 Collectable for awhile. Who ever heard of  Dean Griff  collectables? These are adorable woodland creatures and they have their very own houses and figurines that look really great on a tree. Again for this tree I gave a layered look with snow. The snow covers up what ever you use as a base to show your collectables. Since these ornaments are very colorful, I put in white berry sprays to make a contrast in the tree. You could add in frosted pine cones and other colored berry sprays if you want more color.


Tuesday, May 17, 2011

Putting Collectables in your Christmas Tree.


Putting Collectables in a Christmas Tree? Am I crazy or what? Well you decide, but I think that collectables look great in a Christmas Tree. I like the contrasting colors of white and red for this tree. I used Dept. 56 Snow Babies in this tree. You can actually put any collectable you want in a Christmas Tree.

Here are some tips for putting them in your tree safely. First you need to make space in the tree. This can be done by pushing branches and tying them into the one above and below to hold them apart. You need to get some open areas and this is the way to do that. I did it about every two feet down the tree and all the way around.

Next, you will want to have some chicken wire handy to put over the areas that have to much space so you can make sturdy flat level areas. Lay some cotton batting over this and you won't see the wire.

Place your collectables in the tree. Be sure to use some floral wire to tie them in. If they are to heavy, place them under the tree instead of in it.

Finally decorate around the tree in the areas in between the open areas. Use floras, ribbon, or even decorative bulbs. Throw on some glitter snow and your all set. Make sure to make the tree topper match the rest of the tree or it may not look right. This tree would look funny with a traditional lighted star on the top.
I will add pictures with other collectables at a later date. Thanks for reading.

Sunday, May 15, 2011

Creating a Christmas Village


 Visit urbanchristmas on youtube.com


 Subscribe in a reader


 Welcome to creating your own towns and villages. I believe we all at one time or another liked to play with doll houses and train sets. Whether your a man or a woman, young or old, into collecting or not, it doesn't matter... Who can resist the lore of creating their own town? You make it the way you think it should be and there is just something irresistible about that.


Although it is really fun, there is quite a lot of work involved. Here you will see and learn many tips to make creating your town easier.


A few tools you might like to have to make the job easier are, Styrofoam (hot wire) cutter, electrical power strips, and hot glue gun. You will also need Styrofoam sheets, (found in craft stores) blanket of snow (cotton batting), and sprinkle snow.

Styrofoam Sheets
Hot wire cutter


Blanket of  Snow


The first thing you will want to do is pick the area where you want to place your village. Make sure you give it plenty of space so you can add trees and accessories. The accessories add realism to your village making them look like much more than a figurine just sitting there. The best surfaces are tables or buffet tops. Mantels are very nice but they limit how much arranging you can do. They are great for small collections though. 


After you have chosen your area, you will want to get the Styrofoam sheets and lay them out on the surface. (If your afraid of scratching the furniture, cover with cloth first.) Lay out a single layer over the entire surface leaving a border of 1 foot all the way around the outside with nothing. Start placing your houses where you want them on the Styrofoam sheets. As you work, you may decide that you want certain houses higher. Place another sheet under them. If you don't need the whole sheet use the cutter to make them the size you want. Be sure to keep the tallest pieces in the middle and smaller pieces on the outside. This makes them much easier to see. If you wish to use brick streets that go through your town (roads), leave space for them now when placing the houses/buildings. You can even create a town square in the very center. Just make sure to use enough Styrofoam sheets to get it high enough to be seen.


After you have all your houses/buildings where you want them, get the cords and put them into the houses. Make sure you have new bulbs in them so you don't have to worry about burnt out bulbs half way through your holiday season. Run the cords to a power strip (or two) and plug in. If you have a town square, I would put a power strip on each side of the table so they don't run across wide open areas to much. To hide the cords, you can use the Styrofoam cutter and shave off 1/4 of an inch of the sheets and push the cords down into the crevasses.


After your village buildings are placed and lit up, you will want to add some of the accessories. If you have any accessories that light up, definitely place them now! If you are using street lamps place them so they zig zag back and forth across the street. After you have them in place, use sticky tack or hot glue to keep them upright and not moving. Now place you brick road over the top of the wires, hiding the street lamp wires. Run the cord back behind the nearest building. Completely place all your roads down now. If you don't have a road you can make one using fish tank gravel, sand, thin pieces of slate or rock. Don't place any people yet. Do put your trees in now. Mix them up for a more realistic look.


 Now you need to get the blanket of snow ready. You will place the blanket of snow under the houses. It is thick and pulls apart easily so you can pull some of the snow up and over any cords that you can see. Push it right up to the houses. Cover all cords and also the power strips. Cover the power strips very loosely so they can breath. You don't want them to get to hot. Around the outer edge cover completely with snow. Now you should see only lit buildings and trees and street lights and lighted accessories. No cords. Lastly, go into village and place people,   cars, animals, and any other little accessory you have to add to the look. Use some plastic and glittery snow to sprinkle over the entire village to give it a look of fresh fallen snow. You may sprinkle white or silver glitter on the blanket of snow for the same affect. 


These are some different village displays you could get ideas from. Have fun!


This is the Dept. 56 New England Village.
This display is on a tiny table with a wreath placed above. When trying this...Make sure you have the building tied into the wreath very securely.


This is Dept. 56 Original Snow Village. Notice how the streets stretch back into the village. Also the buildings in the back are higher than those in the front so you can see them. The streets also gradually go up the slope also.


This is another Dept. 56 Original Snow Village. Notice how the streets go back and wind through the houses. Again the houses in the center are raised higher than those in the front so they can be seen.


This is Dept. 56 Christmas in the City. I tried to give this the feel of a city by placing a city park in the center. I also used lots of accessories to give it a hustle and bustle feeling of Christmas.


The Photo at the top of the page is another way to display           houses. For those folks who have this type of window in their homes, a village here looks beautiful and can be seen from  outside their homes. This is a nice replacement for a Christmas Tree. The buildings displayed are Dept. 56 Dickens Village.   

Visit urbanchristmas on youtube.com